Perfect Pizza Dough Recipe with Bread Flour – My Foolproof Method for Homemade Pizzeria Magic
There’s something magical about making pizza at home. The smell of yeast waking up, the stretch of smooth dough under your hands, the anticipation of that first slice fresh from the oven. Over the years, I’ve tested countless ways to make the perfect base, but nothing – and I mean nothing – beats a pizza dough recipe with bread flour.
Why bread flour? Simple. It’s the key to that chewy, airy, slightly crisp crust you dream about when you think of authentic Italian pizza. All-purpose flour makes a decent pizza, but bread flour has that higher protein content. That means stronger gluten, better stretch, and the kind of crust that can hold up under gooey cheese, hearty sauce, and all the toppings your heart desires.
This recipe isn’t just a formula – it’s my tried-and-true method I’ve perfected after years of Friday night pizzas, family gatherings, and plenty of delicious trial and error. So, grab your mixing bowl and let’s get our hands a little flour-dusted.


Ingredients You’ll Need
Here’s everything laid out nice and neat. I measure in cups for convenience, but grams are included too for those of you who love precision (and if you really want consistency, I recommend weighing).
| Ingredient | Measurement (Cups) | Measurement (Grams) |
|---|---|---|
| Bread flour | 4 cups | 500 g |
| Warm water (110°F/45°C) | 1 ½ cups | 360 ml |
| Instant yeast | 2 ¼ tsp | 7 g |
| Sugar | 1 tsp | 4 g |
| Olive oil | 2 tbsp | 30 ml |
| Salt | 2 tsp | 10 g |
Optional but highly recommended:
- A sprinkle of semolina flour for dusting (gives the bottom crust a rustic crunch).
- A drizzle of extra virgin olive oil over the dough just before baking for golden shine.
Step-by-Step Instructions
Here’s where the magic happens. Follow along, and I promise you’ll end up with dough that rivals Domino’s, but with that rustic Italian soul.
Step 1: Wake Up the Yeast
Mix warm water, sugar, and yeast in a bowl. Let it sit for 5–10 minutes until it’s frothy. That foam is your yeast saying, “I’m alive and ready to work!” If nothing happens, your yeast may be old – grab fresh yeast, because dough only rises if yeast is happy.
Step 2: Mix the Dough
In a large bowl, combine bread flour and salt. Make a well in the center, then pour in the yeast mixture and olive oil. Stir with a wooden spoon until it starts to come together. It’ll look shaggy – don’t worry, that’s exactly what you want.
Step 3: Knead the Dough
Turn the dough out onto a lightly floured surface. Knead for about 8–10 minutes until smooth and elastic. The dough should spring back when you poke it. This step develops the gluten, which gives your crust that incredible chewiness.
Tip from my kitchen: If you’re using a stand mixer with a dough hook, knead for about 6 minutes on medium speed.
Step 4: First Rise
Shape the dough into a ball and place it in a lightly oiled bowl. Cover with a damp towel or plastic wrap. Let it rise in a warm spot for 1–2 hours, or until doubled in size. Watching dough puff up is one of my favorite parts of bread-making – it feels like the kitchen’s alive.
Step 5: Shape Your Pizza Base
Punch down the dough gently to release air. Divide it in half if making two medium pizzas, or keep it whole for one giant family-style pie. Roll or stretch it out on a floured surface until it’s about ¼ inch thick. Don’t fight the dough – let it stretch naturally.
Step 6: Par-Bake (Optional but Amazing)
If you like an extra-crispy bottom, slide your dough onto a preheated pizza stone or baking tray and bake at 475°F (245°C) for 4 minutes before adding toppings. This seals the base and keeps it from getting soggy.
Step 7: Top and Bake
Add your favorite sauce, cheese, and toppings. Bake at 475°F (245°C) for 12–15 minutes until the crust is golden and the cheese is bubbly.
Pull it out, slice, and let the table go silent for a moment while everyone takes that first, glorious bite.
Tips & Tricks for Perfect Pizza Dough
Over the years, I’ve picked up little secrets that make a big difference. Here are my best ones:
- Use bread flour, not all-purpose. That higher protein content is what gives your crust strength and chew.
- Don’t rush the rise. If you have time, let the dough cold ferment in the fridge overnight. The flavor deepens beautifully.
- Preheat your oven properly. A hot oven is crucial. If you have a pizza stone, let it preheat for at least 30 minutes.
- Avoid overloading toppings. Too many toppings weigh down the dough. Keep it balanced.
- Olive oil is your friend. Brush the crust edges with oil before baking for golden, blistered perfection.
FAQs – Answering Your Pizza Dough Questions
1. Can I make this pizza dough recipe without bread flour?
Yes, but the texture won’t be the same. All-purpose flour works, but you’ll miss that signature chewiness bread flour gives.
2. How long can I store pizza dough?
Keep it in the fridge for up to 3 days, wrapped well. Or freeze it for up to 3 months. Just thaw overnight in the fridge before using.
3. Do I need a pizza stone?
No, but it helps! A pizza stone or steel holds heat and gives that pizzeria-style crust. If you don’t have one, a heavy baking tray preheated in the oven works too.
4. Why did my dough turn out dense?
Most likely the yeast wasn’t active, or the dough didn’t rise long enough. Make sure your water is warm (not hot) and always check yeast freshness.
5. Can I make this recipe with whole wheat bread flour?
Yes! Swap up to 50% of the bread flour with whole wheat for a nuttier, hearty flavor. Add a touch more water if the dough feels stiff.
Final Thoughts – From My Kitchen to Yours
Making pizza dough from scratch is more than a recipe. It’s a ritual. It’s the joy of flour-dusted countertops, the rhythm of kneading, and the smell of baking bread filling your home.
This pizza dough recipe with bread flour is one I swear by. It gives me that perfect balance of crisp edges, chewy bite, and soft center – the kind of base that makes you proud to serve your homemade pizza to anyone, whether it’s family, friends, or just a quiet dinner for yourself.
So next time you’re tempted to order in, try this instead. Trust me, the moment you pull that bubbling, golden pie out of your oven, you’ll feel like the best pizzaiolo in town.
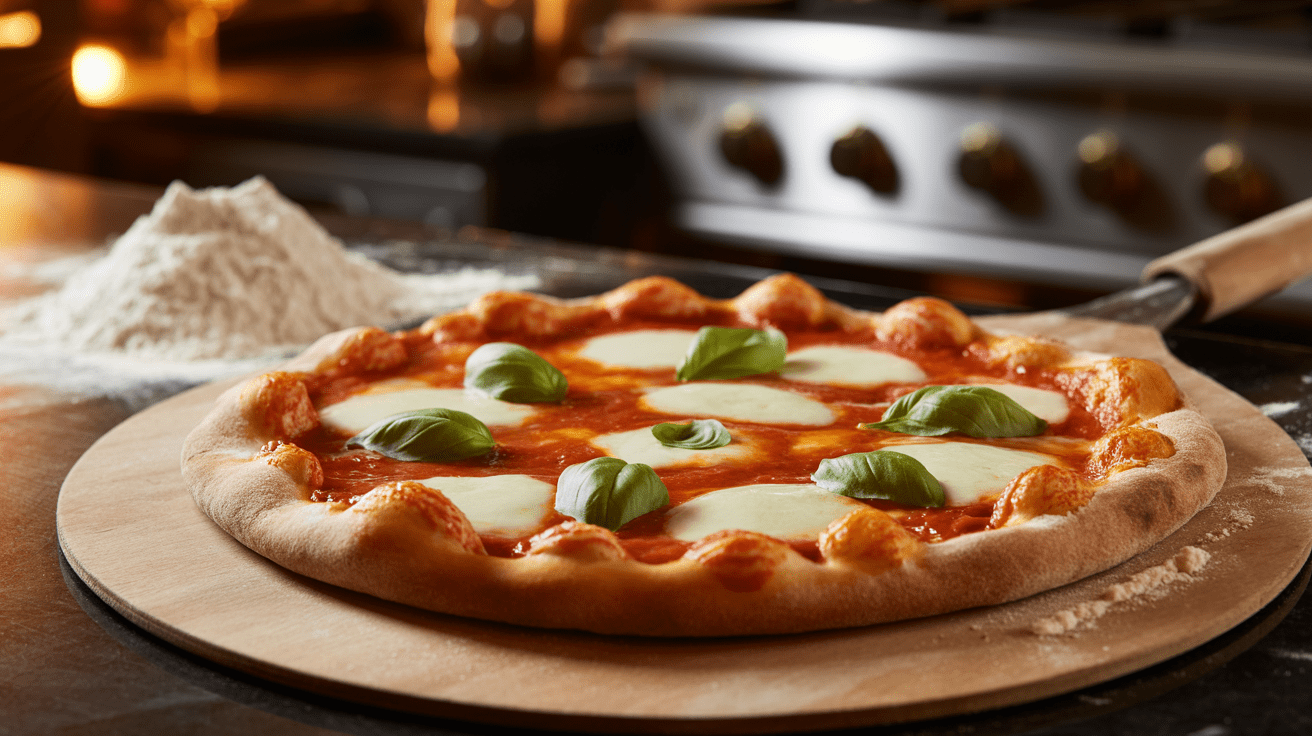
And once you’ve mastered the dough? The toppings are your playground. From classic Margherita to bold barbecue chicken or even a cheeky dessert pizza – the world is yours, one slice at a time.
Happy baking, my friend. And don’t forget to save me a slice.
See Also: Homemade Pizza Dough: The Ultimate Guide to Perfect Crust Every Time

Vinit Hirave is a passionate content writer for Pizzetteria Brunetti. A true pizza enthusiast, Vinit’s love for authentic flavors goes beyond the keyboard—he has hands-on experience working in a pizza shop, giving him a deep understanding of what makes a perfect slice. Through his writing, he shares stories, tips, and insights that reflect both his industry knowledge and his genuine affection for the art of pizza-making.