
If you’ve ever searched for an easy, reliable, beautifully soft pizza dough recipe, chances are you’ve stumbled across Sally’s Baking Addiction pizza dough. Sally is known for her trustworthy baking recipes, and her pizza dough is a fan favorite because it’s simple, forgiving, and consistently delicious.
As someone who grew up in an Italian kitchen — stretching dough with my nonna, kneading beside wood-fired ovens, and tasting more crusts than I can count — I love seeing home bakers embrace pizza-making with enthusiasm. So today, I’m blending the best of both worlds: the approachable method inspired by Sally’s Baking Addiction with my authentic Italian technique, resulting in a pizza dough that is soft, chewy, crisp at the edges, and bursting with character.
This is not a copy or rewrite of her recipe.
This is my Italian-style interpretation, built on:
- simple ingredients
- long fermentation
- a touch of olive oil
- and old-world dough handling
If you want a pizza crust that’s easy for beginners yet flavorful enough for pizza purists, keep reading. This dough will become your go-to — just like it became mine.

🍕 Why This Dough Works: What I Love About Sally’s Style + Italian Tradition
Sally’s pizza dough is known for:
✔ beginner-friendly steps
✔ short rise time
✔ soft, pliable texture
✔ consistent results
Italian pizza tradition, on the other hand, values:
✔ slow fermentation
✔ high hydration
✔ minimal ingredients
✔ bold flavor development
✔ intense heat baking
What you get here is the beautiful marriage of the two.
Imagine:
- a dough that comes together easily,
- behaves beautifully in your hands,
- bakes with a perfect golden crust,
- and tastes like the rustic Italian pizzas served in small family trattorias.
That’s exactly what this recipe gives you.
🧾 Ingredients + Measurements (Inspired by Sally’s foundation, perfected with Italian touch)
Below is the full ingredient list for two standard 12-inch pizzas.
Pizza Dough Ingredients
| Ingredient | Measurement |
|---|---|
| All-purpose flour or bread flour | 3 cups (360g) |
| Warm water | 1 cup (240 ml) |
| Instant or active dry yeast | 2 ¼ tsp (1 packet) |
| Olive oil | 2 tbsp |
| Sugar or honey | 1 tbsp |
| Fine sea salt | 1 tsp |
| Optional: cornmeal or semolina | For dusting the baking surface |
👩🍳 Step-by-Step Instructions — My Italian Expert Guide
Step 1: Activate the yeast (5 minutes)
Combine the warm water, sugar (or honey), and yeast in a bowl. Stir gently.
Let it sit until a light foam forms on top — that soft fizz means your yeast is alive and ready to transform flour into a beautiful dough.
The aroma alone takes me back to my nonna’s kitchen.

Step 2: Mix dry ingredients
In a large bowl:
- add the flour
- sprinkle in the salt
- mix lightly with your hands
Salt strengthens gluten later, but it should not touch the yeast directly.
Step 3: Bring the dough together
Pour the yeast mixture into the flour.
Add olive oil.
Stir with a wooden spoon until a shaggy dough forms.
The dough will feel slightly sticky — that’s exactly what you want. Sticky dough always makes a softer crust.
Step 4: Knead until smooth (8–10 minutes)
Kneading is the moment you feel the dough transform.
Press with your palms.
Fold.
Turn.
Repeat.
After 8–10 minutes, the dough becomes elastic, smooth, and warm from your hands’ energy.
It should stretch without tearing — a sign of strong gluten development.
Step 5: Let the dough rise (1–2 hours)
Place dough in a lightly oiled bowl.
Cover and let it rise in a warm corner of your kitchen.
You’re looking for doubling in size.
Sally uses a quicker rise, and that works beautifully.
But if you want deeper Italian flavor, let it rest for 2 hours.
Step 6: Optional — cold ferment for 12 to 24 hours
This step is where Italian magic happens.
A slow, cold rise in the refrigerator:
- improves texture
- adds deep, rich flavor
- creates perfect chewiness
- gives restaurant-quality crust
This step is optional, but once you try it, you’ll never skip it again.
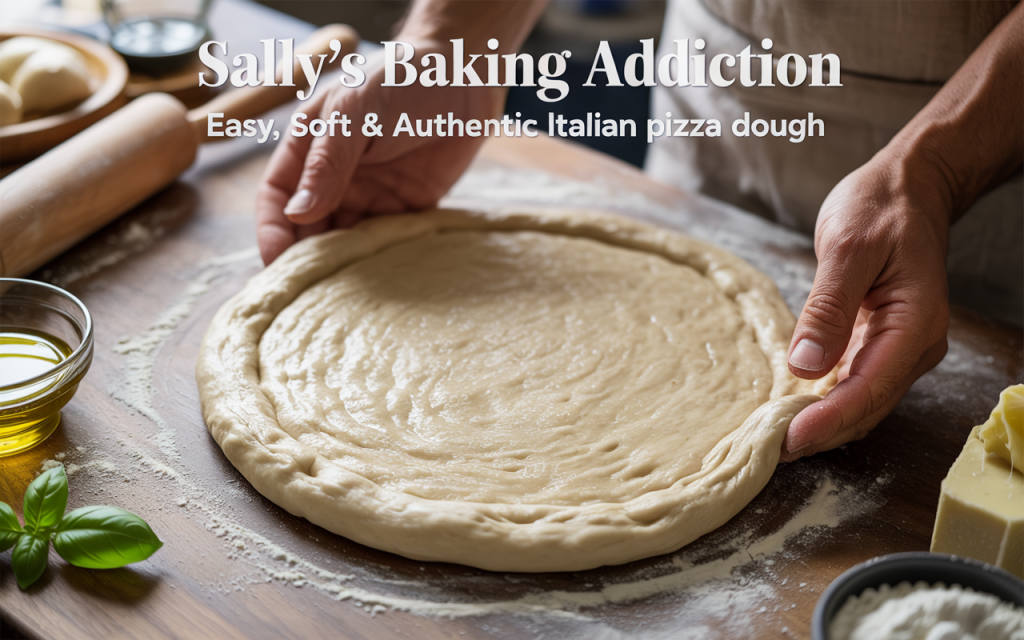
Step 7: Shape the dough (never with a rolling pin)
Rolling pins crush the air bubbles you worked hard to create.
Instead:
- press the center gently with fingertips
- push air toward the edges
- stretch the dough on your knuckles
- allow the edges to become fluffy
Your dough circle should look soft, relaxed, and ready for toppings.
Step 8: Prep for baking
Preheat your oven to the highest temperature it can reach — ideally 475–500°F (250–260°C).
If you use a pizza stone or steel, put it in now.
If using a baking sheet, turn it upside down and preheat it.
Hot surface = restaurant-quality crispness.
Step 9: Add toppings
Start with a thin layer of sauce.
Add mozzarella.
Finish with your favorite toppings.
Here are some combinations that shine especially well with this dough:
- classic margherita (tomato, mozzarella, basil)
- mushroom + garlic + parmigiano
- pesto + cherry tomatoes
- roasted peppers + olives
- pepperoni + mozzarella
The dough supports anything — from simple to decadent.
Step 10: Bake until golden
Slide your pizza into the oven.
Watch the edges puff.
Watch the cheese melt into creamy pools.
Watch the bottom crisp up perfectly.
Bake for 10–12 minutes, depending on your oven and toppings.
Remove when the crust is golden and slightly blistered — a signature Italian sign of perfection.
🌟 Tips & Tricks From My Italian Kitchen
These are the secrets behind every perfect pizza I’ve ever made.
1. Hydration is everything
A slightly sticky dough makes the best crust.
Do not overflour.
2. Always use olive oil in the dough
It gives softness, moisture, and classic Italian aroma.
3. Let the dough rest before stretching
Even 10 minutes makes shaping easier.
4. Cold ferment = restaurant-level flavor
This is my #1 tip
—and the difference between “good” and “wow.”
5. Use semolina or cornmeal to prevent sticking
It adds crunch and prevents the dough from tearing.
6. Bake hot and fast
A hot oven gives the blistered crust that Italians adore.
7. Don’t overload toppings
Let the crust shine.
8. Brush edges with olive oil before baking
You’ll get a golden, aromatic, delicious rim.
❓ FAQ – Sally’s Baking Addiction Pizza Dough + Italian Pizza Tips
1. Is this the same recipe as Sally’s Baking Addiction?
No — this is my Italian interpretation inspired by her style.
It uses similar ingredients but includes Italian techniques like cold fermentation, high hydration, and stone baking.
2. Can I use bread flour instead of all-purpose?
Yes! Bread flour gives:
- more chew
- better rise
- stronger structure
It’s wonderful for pizza.
3. How long will the dough last in the fridge?
Up to 72 hours.
The flavor improves each day.
4. Can I freeze the dough?
Absolutely.
Freeze after the first rise.
Thaw in the fridge overnight.
5. Why is my dough tearing?
It needs more time to rest.
Let it sit for 10–15 minutes and try again.
6. Why is my crust too dense?
Common reasons:
- too much flour added during kneading
- short rise time
- rolling pin instead of hand-stretching
- insufficient oven heat
7. What temperature is best?
As hot as your oven allows:
475–500°F (250–260°C)
Higher = better blistering and better texture.
❤️ Final Thoughts: A Pizza Dough You’ll Make Again and Again
There are many reasons I love Sally’s Baking Addiction pizza dough — simplicity, reliability, and beginner-friendly charm. But when you layer those qualities with traditional Italian technique, something magical happens.
See Also: Perfect Whole Wheat Pizza Dough | Soft, Healthy & Authentic Italian Recipe


